Create Scheduled Backups Using Wbadmin Enable Backup
Learn how to configure scheduled backups with Wbadmin enable backup from command line. Workarounds to run daily, weekly or even less frequent scheduled backup to shared folder over NAS.
by Delia Updated on December 19, 2022
WBadmin enable backup
The built-in backup utility in Windows 8/8.1/10/11 and Windows Server 2008/2008R2/2012/2012R2/2016 allow users to configure or modify a daily scheduled backup. These operations can also be performed from command line using Wbadmin.
☛In Windows Server 2008, the target location must be an entire disk (volume is not an option), and the disk will be formatted before use, namely all the data on it will be deleted.
☛In Windows Server 2008 R2 and later version of Windows Server, you can specify a disk, or volume as the target storage location, and a shared folder is also supported. However, if you choose a shared folder, you cannot add more locations for the backup, namely you can but specify one shared folder as a target location. What’s worse, the next backup will be overwrite the previous one.
Therefore, if the backup somehow fails, which cannot be guaranteed, you will most likely end up with no backup available. For all these limitations or flaws, luckily, there are workarounds.
By default, the scheduled backup created by Windows WBadmin is performed by fast incremental backup (differential backup, to be more accurate) fast differentials, which is to backup only changed files. Unlike other backup software, the modified blocks will be transferred to form a new full backup. It looks like Windows always performs full backup, but only changed files are transferred.
How to create scheduled backups with WBadmin
To use WBadmin utility, you must run Wbadmin from an elevated command prompt. To open an elevated command prompt, enter “command prompt” in the search box, in the searching results, right-click Command Prompt, and then click Run as administrator.
To create a scheduled backup, you can run the following Wbadmin scheduled backup command syntax: wbadmin enable backup –addtarget:\\192.168.0.221\Public\schedule –allcritical –include:D: –user:1 –password:1 –schedule:00:00
The switch –addtarget is to specify a storage location for the backup, and you can use the drive letter for specifying a disk or volume. Then the command becomes: wbadmin enable backup –addtarget:E: –allcritical –include:D: –schedule:00:00 –quiet
The backup schedule can be set more frequent. To run the backup daily at 00:00 and 12:00, you can use the following command: wbadmin enable backup –addtarget:E: –allcritical –include:D: –schedule:00:00,12:00 –quiet
The switch –quiet is to run the subcommand with no prompts, so you would not need to confirm it before running the backup as the screenshot.
If you are using Windows Server 2008, which does not support backing up to network share, you can create a virtual hard disk (VHD) on the shared folder and then backup to that VHD. Or you can create a batch file with a one-time-backup command and then use Task Scheduler to run this batch file. This method is also useful if you want to create weekly scheduled backup while Windows Server only allows you to create daily scheduled/auto backup, leaving no option to create a less frequent scheduled backup.
More flexible way to create scheduled backups
AOMEI Backupper allows users to create multiple scheduled backups from command line to any locations File Explorer detects in a more flexible way. To create scheduled backups with AOMEI Backupper:
1. For PC users, Download and install AOMEI Backupper Standard (free). For Server users, download AOMEI Backupper Server. For details, you can learn more in the downloads page.
2. Under Backup tab, choose one of the backup types that AOMEI Backupper provides from file/folder, system, partition, and disk backup. Let’s take system backup as an example.

3. Here you just need to select a backup target location as the program will automatically choose the backup source partitions for system backup.

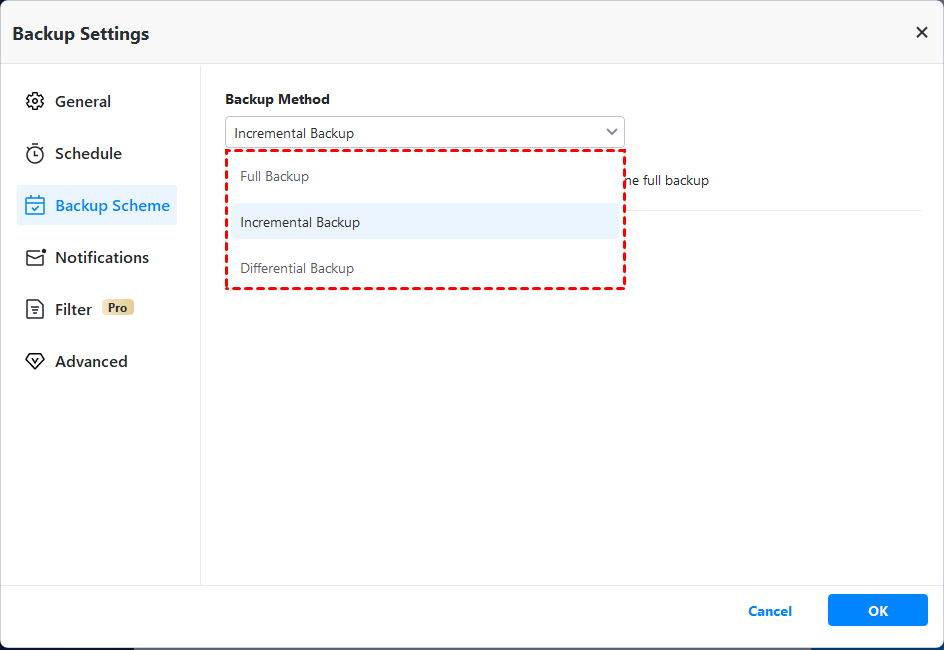
4. Click Schedule to configure a daily/weekly/monthly or even triggers scheduled task. It supports using Task Scheduler to run the task. You can also set the backup followed by full, incremental or differential backup by clicking advanced option (Differential Backupoption is avaliable in Professional version).

5. Click Start Backup to add this task or run immediately.
As you can see, AOMEI Backupper gives you more options when configuring a backup compared with WBadmin enable backup. Besides this intuitive interface, AOMEI Backupper also provides AMBackup.exe utility that allows users to restore or backup from command line.